Sunday, December 16, 2012

Fine Art Photography Techniques: Sunday's Shot Tech

Christmas Doll: Community Christmas Parade  L. A. Lewin Copyright 2012

Greetings!  Hope everyone is well and ready for the holiday season!

suburban community North of Atlanta was having their annual Christmas parade, and I asked the organizer if I could capture a few shots - he pleasantly agreed.

Colored lights sparkled and Christmas music blaring - holiday-joy resonated in the air!  To capture the mood, Flash was not used - but instead, I dial-in a very high ISO value.  High ISO settings create a low signal-to-noise ratio or a noisy - film-grain character.  In landscape or most portraiture photo shoots this is  not the first choice for photographers, but to create or in this case, capture a mood, the high ISO setting was utilized.  I was aware making this choice may yield less "keepers" that if I used Flash.  But eliminating Flash was essential to creating the holiday spirit I felt while on location.

I approached each of the parade floats just before they began their journey through the neighborhood - at least I would minimize the amount shaking or movement of the subjects - to give me more chances to capture acceptable images.

Through the viewfinder, I kept aware of the space surrounding the subjects and tried to keep cars, light posts and identifying signs out of the frame.  Because I was working fast and did ask children or adults to pose, I kept my Canon 16-35mm F2.8 L II set at 35mm for the entire session.  Later I can re-crop if needed to compose as desired.  Being dark and not using Flash I dialed in an F/2.8 aperture, wide-open, setting.  This will allow as much as light as possible to pass through the lens and onto the sensor.  As it relates to focusing, the wide-open setting will create the most bokeh - or blur - near and around my point of focus, thus narrowing my room for error, but aware I will be creating soft, film-like photographic images - and this is what I wanted. 

The lovely image above was one of 4 frames captured while kneeling to the side of the float.  The young girls doll-like expression-character captured the innocents and spirit I was looking for. 
 Your feedback is always welcomed.  Thank you.

Technical: 

  • ISO 6400 (No Flash)
  • Aperture Priority mode: I set the aperture to F2.8, (wide open)
  • Captured @35mm angle of view
  • Shutter: 1/50 second
  • Chromatic & Luminance corrections via CS5 software
  • Black+White conversion via Silver Efex Pro 2 digital darkroom software
  • No other post-production manipulation applied to this image file

Friday, October 12, 2012

Official Photographer of the 24 HRS of Booty in Atlanta!


2011 Atlanta 24 Hours of Booty  Photo by L.A. Lewin
Hello everyone!  

Again, I am very excited to be the official photographer for the 24 Hours of Booty event in Atlanta, on the weekend of Oct. 13th. & 14th.!

On Nov. 9th. a small collection of photographs will be posted on my site for viewing and purchase.  This time around I am offering only the image file - prices start @$10 for one image file!

For the next 12 months 25% of ALL purchases from my site will be donated to the 24 Hours of Booty Foundation!


2012 Atlanta 24 Hours of Booty  Photo by L.A. Lewin


Saturday, September 1, 2012

Fine Art Photography Techniques: Sunday's Shot Tech


Great Smoky Mountains National Park: Deep Creek Area


Anne and me traveled to Bryson City, NC last weekend to go hiking and mountain biking; we began our short weekend taking a hike at dusk.   Carrying our tripod and camera, we took a short loop into the Deep Creek Area just outside Bryson City.  A combination of dead silence and the heavy canopy blocking much of the light created a very peaceful atmosphere.

Near the end of our walk we stopped once or twice to listen to the silence.  I looked up to view the treetops and found this interesting silhouette.   (Truth is, I like this photograph enlarged to a 20x20 square print; smaller versions, (like the one illustrated in this post), does not show the leaf detail; the main attraction of this composition.)

Click photo for a larger view

Using the tripod would be ideal, but instead hand held this shot.  This frame was the keeper out of a three shot bracket.

      Photo Tech: 
·      As in most of my shots, ISO = 100, even with the low light; a result of the thick canopy above our heads.
·      Camera was set in Aperture priority mode – I dialed to an F/5.0 setting.
·      Meta data revealed the camera picked a 1/25 sec. shutter speed.
·      I set Exposure Compensation to +1.3
·      This particular frame was composed using the 23mm setting on my new Canon F2.8 16-35mm II L.
Post Production:
·      I felt a “square” crop best represented what I saw through the viewfinder.
·      After making minor dodging mod’s and luminance adjustments, I crafted the BW rendering using Silver Efex-Pro 2.
·      The final you see here also includes a minor application of a copper dip.

As always, I look forward to your feedback and questions.  Thank you.

Best regards,
Lance A. Lewin


Sunday, July 29, 2012

Fine Art Photography Techniques: Sunday's Shot Tech

Signal Mountain Summit: east, the Elk preserve sprawls across the valley floor
After driving 800 plus feet above the valley floor - 7593 above sea level – Anne and me parked and walked – slowly - it took a day or so to get use to hiking and biking at this altitude - the last 100 yards to the summit: we were rewarded with beautiful views to the west, toward the Teton mountain range, and turning, the Elk preserve sprawling the landscape to the east.

Looking east from Signal Mountain Summit - Copyright 2012 Click for larger view

 As a rule, before sunrise and again before sunset, is one of the best times to capture the real beauty this wonderful Earth has to offer – no matter where you live, or visit.  The lighting changes quickly; you need to be ready to change camera dynamics to take advantage of what your eyes see and how the brain develops a rendering.  Of course, the more experience you have in the field, the easier it is to make the correct adjustments.  The photograph above was captured looking east around 6:45pm – in this part of the country, the sun was still a bit high in the sky, but in this case, the cloud formations splashing a crystal blue sky and a variety of textures painted across the Elk preserve, was all the invitation I needed to set up my tripod and compose a shot.

Looking through the viewfinder and pivoting my tripod left and right I scanned the landscape for a suitable composition I felt captured the beauty and emotion I was experiencing.

Technically speaking: after several wide angle choices, I chose the 35mm setting on the Canon F/2.8 16-35mm II L, to best represent my artistic expression.

The Canon 5D Mark II was set in aperture priority and dialed an F/22.0 setting – closing-down the lens yields maximum depth of field, (DoF), what you want on most landscape photographs. 
Camera dynamics:
ISO 100
Aperture = F/22.o
Camera Shutter Speed = 1/30 sec.
Exposure compensation = 0
Tripod
Canon RC-1 electronic trigger

Post Production:
The color image file was cropped with a 3:2 aspect ratio and adjusted for chromatic and luminance accuracy that best represented the original scene as viewed through the viewfinder.  After I was satisfied with an accurate color image I converted to a black & white photograph. 
Workflow:
CS5 for color and luminance adjustments and to remove dust spots
Color Efex Pro to add a slight neutral density filter, (ND), to help maintain a rich blue sky
Silver Efex Pro 2 for the black and white conversion: used yellow filter to help bring out certain details in the BW version in an attempt to maintain textures I feel is one of the focus points, (pun not intended), in this composition.

There you have it – hope you like the photograph and contact me with questions or comments. 

Thought you may want to know: The fall workshop schedule was posted on the Kennesaw Parks & Recreation web site - hope you decide to join me for one of my 4.5 hour Saturday workshops!  Contact me for details!

Thank you!

Best regards,
Lance

Tuesday, July 17, 2012

Yellowstone National Park – Scorched Canopy

Charred forests give way to new growth – Text & Photographs by L. A. Lewin

Traveling north from Grand Teton National Park our SUV entered the south entrance of Yellowstone National Park around noon.  Our first destination was Old Faithful 20 miles ahead.  But, as we continued north, my wife and I were taken aback when we saw the burned landscape.  We were in shock - in awe - by the vastness the burned forest stretched. 

Burned, and bare, fallen trees lay like pick-up-sticks stretching as far as the eye can see.  Thinned, the hollowed terrain of burned and dried timber was sketched on either side of the road.  Standing naked, some trees still charred - a reminder of the firestorm that ravaged this area – while others colored charcoal grey glistened with a silvery tint in the midday sun. 
Figure 1 Scorched landscape – Copyright L. A. Lewin 2012


I researched Yellowstone National Park archives to obtain details on the events that caused this devastation - here’s what I found: Unless serious damage to property or eminent danger to people is present, most fires are left alone to burn themselves out – allowing nature to dictate terms.  However, in the summer of 1988 – later recorded as the driest summer in history for the region – 248 fires ravaged Yellow Stone, (50 were inside the park), engaging hundreds of fire fighters, and an army of overhead tankers spraying water and fire retardants to snuff flames and regain control.  But, not until the first snow began to fall, was the last smoldering limb extinguished.   Inside the park the fires consumed 793,000 acres and 3 million dollars in lost property!

The 1988 Yellow Stone National Park fires brought national attention to fire management guidelines and by 1992 an updated fire management plan was adapted with stricter rules governing how naturally occurring fires are allowed to burn.


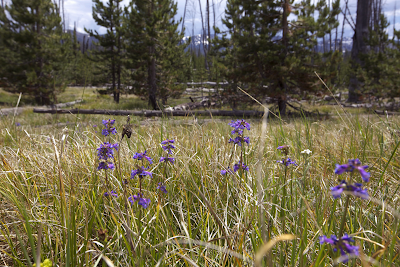
Figure 2 Wild flowers and pine reemerging Copyright L. A. Lewin 2012

When we stopped our SUV, so I could walk the area and capture photographs, closer inspection revealed life was coming back – slowly – but nature was doing its thing.

Among the hundred of new lodgepole pines rising up from the scorched soil, wild flowers colored in between the straight lines of the felled trees, embellishing an otherwise colorless landscape.  And the ground hugging sagebrush scattered everywhere, filling the air with a sweet scent.

 It may take decades before the hills and valleys are covered under a thick, lush canopy, but the resurgence of life has begun.

Resurgence of life closes around a lonely piece of charred stump

Baby pines begin their skyward journey in the revitalization of the forest


The burnt areas of Yellow Stone is widespread. 

In a decade it will be hard to find a trace of the fire storm that ravaged this hillside.


For a complete report on the 1988 Yellow Stone National Park fires, follow this link to their web site.  http://www.nps.gov/yell/naturescience/wildlandfire.htm

Sunday, July 1, 2012

Our New Web Site is Live!!

Though still a work-in-progress, the new web site is Live!

Please, visit the web site often for up-to-date postings - as always,
feel free to contact me if you need immediate assistance!

Thank you for your patience!

Best regards,
Lance A. Lewin
lance@emotionalrenderings.com

http://emotionalrenderings.com

Sunday, May 13, 2012

Fine Art Photography Techniques: Sunday's Shot Tech


Happy Mothers Day, everyone!

Freshly sprinkled from an early morning shower, this beautiful ‘Forever Rose’ bush caught my gaze. 

Photo Tech:
First, let me point out – cloudy overcast and/or rainy mornings are one of the best conditions for capturing wildlife and floral images.   Light from an overcast sky, especially if it is one of those very bright – white – overcast mornings, diffuses the light helping to eliminate shadows, at the same time saturates color.  It is a very exciting time to go out and shoot off a few frames – carry an umbrella if necessary, but get out there!

Though I do not suggest this – I hand held the camera capturing these images; much better to use a tripod when shooting in low light.  As with most of my photography, the camera was set to Aperture Priority mode[1] and wanting some serious Bokeh – or blurring in and around the point of focus - I dialed in f/1.4 to f/3.0 for these series of shots.  Composition was completed through the viewfinder and I shot off about 12 different composition-frames.  Final numbers look like this:
ISO 100
Canon 50mm f/1.4 lens
f/2.2
1/320 sec – This relatively high shutter speed allowed for the successful hand- held capture of this image.
+1/3 exposure compensation

Post Production:
Slight color correction to rid just a hint of green color cast – I used CS5 for this process.  No other modifications were necessary for the final piece.


[1] Aperture Priority Mode – user chooses the F/stop setting and the camera automatically selects the shutter speed.

Sunday, April 29, 2012

Fine Art Photography Techniques: Sunday's Snap Shot Tech


Click for Larger View

This weeks Sunday Snapshot Tech is another frame from a recent photo shoot on the shores of Long boat Key, Florida.  This Gulf coastline is located near Bradenton, about 40 miles South of Tampa.  As a family we have been visiting here for 20 plus years.    Anne and me took a stroll after enjoying a fine meal in Sarasota; the sun dipped below the horizon, the washing and rolling of the agitated surf; after all these years, each time we visit, it is like the first.

Lewin at work Photo by Anne Lewin
Several frames were shot to capture the waves at different positions – I choose this frame with the water completely covering the beach – it conveyed the vastness of the ocean from this vantage point on the beach – the frame illustrates my feelings, my interpretation of what I saw, felt, heard and smelled.   

Photo Tech:
My 70-200mm is already mounted to the tripod, the spiked feet extended to grab hold of the damp sand – I spend a few moments scanning the view – the horizon – for a composition.
After I pick my location it is crucial the horizon is straight through the viewfinder; we know trying to “straighten” an image file in post production will interfere – alter- the quality.  So, we always strive to capture the scene the best we can from behind the viewfinder.

The lens was zoomed to 70mm, the aperture closed-down to f/20, for deep depth of field, (DoF), and most unusual, an 800 ISO value, not to help capture the scene in low light, but as an experiment to add digital noise, (film-grain, if you will), to the picture.  I triggered the shutter via an electronic device to help reduce camera shake during the slow shutter speed required to capture this image.  (A big thank you to my wife, Anne, for capturing me at work; photo of me snapped about 20 minutes before the featured image discussed in this blog entry was captured.)  
Here is the complete list of specs for the above image file:
ISO 800
F/20
Speed = ¼ second
+2/3 exposure compensation
Post Production:
The color image file was adjusted for brightness; a small amount of dodge & burn was applied to the background waves, (I left the drift wood as is).  The BW conversion included a modified blue filter and Cyanotype color dip.  For effect, I added the burnt frame.  If printed, the digital burnt frame will be replaced for either a real burnt edge print or none at all.

The final image shows softness due in part to the slow shutter speed in combination with a little digital noise from using ISO 800.  I hope you like this image and be sure to try this type of shot next time you are on the beach – contact me with your questions.  Have a great day!

Best regards,
Lance

Sunday, April 22, 2012

Fine Art Photography Techniques: Sunday's Snap Shot Tech

We all enjoyed a wonderful dinner with family - getting together to chat - share stories - and I got the latest about Max's tower climbing position with an Atlanta Telecommunications Company.  While we talked on my Father-in-laws porch, I fired off a few frames.

Introduction: 
Though it was very bright outside, the porch overhang diffused the light naturally eliminating shadows and harshness normally associated with bright sunlight.  Perfect lighting for the candid shot I was hoping for, as Max and I talked.

Photo Tech:
The f/2.8 70-200mm lens was zoomed to 100mm for this composition.  Though it was bright - the brightness of the white bench would trick the onboard CPU to underexpose the shot.  I set the [exposure compensation] to +1/3 for all the frames captured and the aperture to f/4.5.  Being in [Aperture Priority] mode, the camera picks the shutter speed to match my f/4.5 aperture setting.  I shot about 10 frames capturing this one image as the keeper.  Notice, I left a lot of space to Max's left; we want to convey a sense of the space or perspective to the viewer.  The view recognizes Max is hanging out; knees up and his position in the corner of this, wide, three person porch swing.

Post Production:
As always, to properly convert a color image to a black & white rendering, first adjust the color image that best represents what you want - normally we want to capture what we experienced at the time of the original exposure.  Sometimes we need to adjust the white balance, brightness and overall contrast - I used basic Dodge & Burn techniques in CS5 and manually color corrected the scene to eliminate a little color cast.   Because I was not able to completely tone-down the red color cast that bothered me - I desaturated the color just a little; lessening the effect of color cast.

The BW conversion was completed using Efex Pro 2 using a yellow filter.  No other exposure modifications was applied.  

As always, please, contact me with questions-comments.  Have a great week!

Best regard's,
Lance
  

Sunday, April 15, 2012

Fine Art Photography Techniques: Sunday's Snap Shot Tech


The crack of dawn showed great photographic potential: gazing through the hotel window the first sparkles of sun light were trying to creep through the lingering fog that was formed by the drop in temperature overnight – 35 degrees to be precise – sitting on top of the relatively warmer surface. 

Anne and me took a weekend get-a-way to Desoto Park in North Eastern Alabama – our agenda included mountain biking and time for me to capture images for my book.  The area is beautiful, rich in its variety of vegetation and untouched landscapes scattered with miles of walking trails meandering up, down and along the Desoto River.  We dressed warmly, sipped a cup of hot coffee and off we went. Anne carried my camera bag; I carried my tripod with the camera already securely mounted.

To be honest, it was very cold – several times stopping to place my hands under my arms to warm my fingers – Anne moved about with little issue taking opportunities to capture a few landscape shots and me working.  Next time I’ll dress warmer. Looking upriver, I saw the scene in the picture posted above. 

Fine Art Interpretation:
I bracketed[1] the upriver scene using three different angles of view – finding which best represented what I was seeing - what I was experiencing.  In this particular case – and common when using a zoom lens – bracketing included changing the composition, though done so without moving the camera’s position.  The final scene was cropped through the viewfinder using the f/2.8 70-200mm, zoomed to 100mm.


Photo Tech:
We are photographing in low light, and trying to capture the ‘grandscape’ our eyes and brain bring to our senses – In aperture priority mode, I dialed the camera to f/22 – a small aperture to create a very wide and deep Depth of Field.[2]  The camera will automatically choose a corresponding shutter speed to complete the exposure. 

Additional settings included my cameras default or calibrated ISO setting of 100.  As I stress in all my workshops, using ISO 100, (and in some cameras the default setting is 200), provides the least amount of digital noise, (in the film days, grain), in your photographs.  Though it was low light, it was still bright enough that I did not shoot this scene as a timed or Bulb exposure, but instead used an electronic triggering device to activate the shutter release button - reducing camera shake by the absence of the user touching the camera. 

Post Production:
First, I carefully adjusted the color image file for chromatic and luminance accuracy – as determined by my interpretation of the scene – little was done to improve upon what the camera captured: I used the Dodge & Burn tools in CS5 to add a touch of highlight to the foreground rocks and limbs in the back ground.  Only after I was satisfied with the color image file did I convert to a Black & White rendering.   There are a few techniques to find the interpretation you are after in a BW conversion, (in both traditional and digital darkrooms), but we will not delve into these techniques here; in the future I will be presenting a special workshop on Post Production methods.  Contact me for details.  

Again, I hope the Sunday Snap Shot Technique blogs help you better understand, and learn how to use the power in your cameras, thus unleashing your creativity!    Have a great day!

Best regards,
Lance  


[1] Bracketing – capturing 3 or more frames of a composition: without moving the position of the camera, three or more shots are triggered using different f-stop setting, ISO, shutter speed or other ways to change how the scene is captured – without changing the original composition.
[2] Depth of Field: what is in focus in front and behind the subject, (point-of-focus).  Please, contact
Lance A. Lewin for further discussion on the cause and effects of Depth of Field.

Wednesday, April 11, 2012

Fine Art Photography Techniques: Sunday's Snap Shot Tech


The photograph is enchanting by its sheer simplicity:

After visiting this beach on Long Boat Key in Manatee County, Florida, many years ago, I was inspired to start pointing my lens Westward and capture these wonderful moments in nature; not just what I was seeing, but more important, what I was feeling.   As a photographer, you strive to crop and capture a scene that captures your emotional state at the time you originally viewed it.   In much the same way, a painter strokes the canvas using color and a variety of brush strokes, hopefully, revealing to the viewer the emotional interpretation as they envisioned. 
Here’s the tech on this photograph: Data for final version
ISO 100
White Balance = Cloudy - cuts down on the blue cast that would normally result from using a 5500K color temp at this time of night.
50mm lens @f/22 (aperture Priority mode) - Using very small aperture creates a very deep and wide depth of field.
Manual fill-in Flash @+2 exposure compensation - Needed to highlight the driftwood in the foreground.
Hand held electronic infrared shutter release device - Remotely trigging the camera to help eliminate shaking.
Camera mounted on a sturdy, spiked-feet, tripod - A steady base-mount for camera is vital for long exposures.
  
After I composed the scene through the viewfinder I instructed my wife, Anne, to walk around the large, sculpture-like, driftwood, and fire the Flash at different points in continuous succession until I yelled, (being windy, it was hard to hear clearly; so I screamed my instructions), to stop! 

The frame pictured above was the result of four bracketed attempts using different fill-in Flash combinations; the +2 Flash compensation setting and a series of five flash bursts was the keeper. 
To enhance a sense of space, I have the final version cropped as a 40x16 print size.

Please, contact me with your questions: lewin.author@gmail.com or 678.294.0502, or leave a comment below.

Best regards,
Lance

Monday, April 2, 2012

Fine Art Photography Techniques: Sunday's Snap Shot Tech

Sunday afternoon - April 1st. 2012 - My son, Max, and his daughter Isla Marie, dropped by for a few minutes - while talking I said, hey, let me grab the lens and shoot off a couple of frames:

Isla walked up and down my front lawn - I manually focused, (I actually tried using AF, (auto-focus), yes, believe it or not - but I felt it was too slow for Isla's quick pace across the lawn), my heavy 70-200mm, set at F/6, and moved about to be sure the background was suitable in case I captured 'the moment'.  Always check for a suitable background - move yourself or subject - if possible - to accommodate the frame - the space.  I took 20 frames and captured the one illustrated above.

First Sculpture the Original Color Frame in Post Production:
In CS5 I slightly corrected color balance to make a bit less warm - the camera tends to cover some images with a color-cast - I slightly biased toward a cool interpretation.   Compared to the the rest of the photo, Isla's face and arms were a bit too dark for my taste - my interpretation: Using Dodge & Burn tools in Cs5 I was able to carefully lighten - but ever so little - Isla's face, and a touch on the arms.

BW Conversion: Efex Pro 2
The final was sculptured as follows: adding a Red filter; light application of vignetting; added a small adjustment to add contrast to Isla's face; Light-Copper dip; added a thin burnt-edge white frame.
Done.

Please, contact me with your comments-questions!  Have a great Day!
LAL